 Bigger
Guides › Premiere Pro
How to Add Subtitles in Premiere Pro (Manual and Automatic)
Two ways to get subtitles on a video in Adobe Premiere Pro: the built-in tools, which are free and great for delivery files, and a faster route that gives you animated, social-ready subtitles in a few minutes.
Updated October 28, 2026 · by The Bigger Studio
Bigger Subs in Premiere Pro is fully tested on Mac. On Windows it is still in testing and may have bugs.
Quick answer
- One or two lines: pick the Text tool (T), click the Program Monitor and type. Trim the text clip to match the voice.
- A whole video: open Window › Text, go to the Captions tab and let Premiere transcribe the sequence, or import an
.srtfile. - Animated, word-by-word subtitles: use Bigger Subs, which opens as a panel inside Premiere Pro 2025 or newer and puts the subtitles on their own track.
Method 1: type subtitles with the Text tool
This is the oldest way and it still makes sense for a title, a quote or a few lines.
- Move the playhead to the moment the person starts talking.
- Select the Type tool (T) and click inside the Program Monitor. Type the line.
- Open the Essential Graphics panel (Window › Essential Graphics, Edit tab) to choose the font, size, fill, stroke and shadow.
- Trim the new text clip on the timeline so it ends when the sentence ends.
- Duplicate the clip with Alt/Option + drag, edit the text, and repeat for the next line.
The problem is time. A three-minute video can have 60 or more lines, and every one needs a clip, a trim and a check.
Method 2: use Premiere's captions
Premiere Pro has a dedicated captions workflow that is much faster than typing every line.
Transcribe from the audio
- Open Window › Text.
- In the Transcript tab, choose the language and select Transcribe sequence. Premiere writes the words and marks who is speaking.
- Switch to the Captions tab and choose Create captions. Pick the line length, the number of lines and the format you need.
- A caption track appears above your video. Click a caption to fix it in the Text panel.
Import an SRT
If a client or translator sent an .srt, use File › Import and drag the file onto the timeline. Premiere turns it into a caption track you can still edit.
Style and export
- Select the caption track to change the font, color and position for all the captions at once.
- For a delivery file, open File › Export › Media, then the Captions tab. You can export a separate sidecar file or burn the captions into the video.
This is the right tool when the client wants a clean .srt or open captions on a long interview, course or documentary.
Where manual methods slow you down
- Captions are shown as a block of text. There is no word-by-word movement, no highlighted key word and no sound.
- Making short, punchy social subtitles still means breaking and styling lines yourself.
- Every change in wording or timing means going back through the clips.
For reels, ads and shorts, where most people watch on mute, you want the animated look. That is where Bigger Subs comes in.
Method 3: animated subtitles in minutes with Bigger Subs
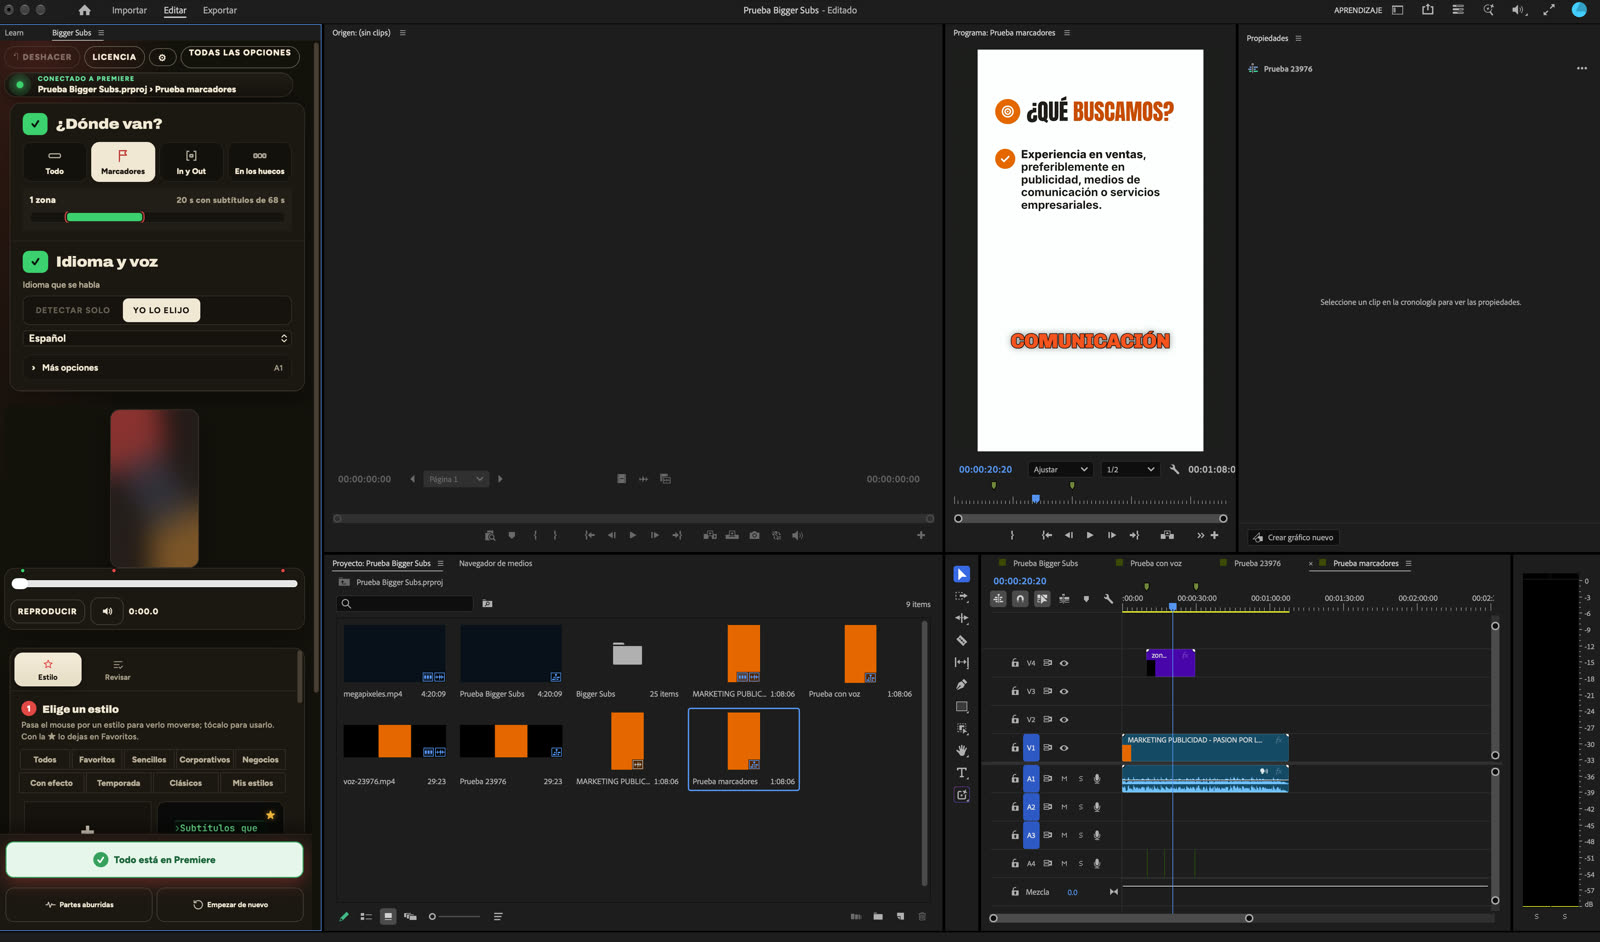
Bigger Subs listens to the voice on your computer, writes every word, times it to the voice and puts the result on your timeline as a transparent clip on its own track. In Premiere Pro it lives in a panel, so you never leave your project.
- Install Bigger Subs on your Mac or Windows computer and open Premiere Pro 2025 or newer.
- Open Window › UXP Plugins › Bigger Subs.
- Choose where the subtitles go: the whole sequence, only the parts between markers, or only the In/Out range.
- Pick the language of the voice, then pick a style from the gallery. A preview shows it on a real frame of your video.
- Press create. The subtitles arrive as a transparent ProRes 4444 clip on their own track, and the sounds on theirs.
- Open the review step to fix any word, then update the clip.
You get more than 60 styles, automatic emphasis on the words that matter, effects and sound effects. Safe margins keep the text away from the buttons on TikTok, Reels and Shorts. Nothing is uploaded: the video is transcribed on your computer, so it also works offline after you activate it.
Which method should you use?
- Client needs an SRT or a caption file: Premiere's Captions tab.
- One title or a single quote: the Text tool.
- Short videos for social media: Bigger Subs.
They also work together. Many editors export an .srt for accessibility and use animated subtitles for the version they publish on social media.
Tips for subtitles people actually read
- Keep every subtitle to one or two lines, about 40 characters per line.
- Use a bold sans-serif font with strong contrast against the footage.
- Keep text out of the bottom fifth of vertical videos, where social apps place their own interface.
- Always check names, brands and numbers. Those are where automatic transcription makes mistakes.
FAQ
Can I add subtitles in Premiere Pro for free?
Yes, if you already have Premiere Pro. The Text tool, the Text panel and the captions workflow are built in, so basic subtitles need no extra tool.
Why do my captions not appear in the exported video?
Captions are only included if you ask for them. In the export window, open the Captions tab and choose to burn them into the video, or export them as a separate file.
How do I make subtitles move word by word?
Premiere's built-in captions show whole phrases. For word-by-word movement, highlighted key words and sound, use Bigger Subs, which adds them as a transparent clip on your timeline.
Does Bigger Subs work in Premiere Pro on Windows?
Yes. It works on Mac and Windows with Premiere Pro 2025 or newer, and it also works with DaVinci Resolve and Final Cut Pro on Mac.
Try Bigger Subs free for 2 days
Mac and Windows. Works with Premiere Pro 2025 or newer, DaVinci Resolve and Final Cut Pro. Everything runs on your computer.
Get the free trialMore guides: Animated subtitles in Premiere Pro · Auto captions in Premiere Pro · Captions plugin for Premiere Pro